Today i would like to describe here step by step procedure to integrating paypal integration (express checkout) in MVC3 web application using razor view engine.
1)Create new MVC3 internet web application.
2)change Index page under Home section and as per below fig
![](https://blogger.googleusercontent.com/img/b/R29vZ2xl/AVvXsEibLQX8C9Dbq7OOuh6H2n7LdgxohAJtVS3XFByP6W2Dzn6nggtlVFRBn_EVqVG2mM7JAD6ZZhugGehiMwgf-wGMWGjtTJUPJlzMGserZFkEF3plnki9kaa6Zuk7U74-FBNv2KYSfhy3kxm0/?imgmax=800)
![](https://blogger.googleusercontent.com/img/b/R29vZ2xl/AVvXsEhIimFoJQSxoecGgHKUw0rsEMXRepCC8KRntf7EsWCuCa4W5Fukr2SjQ36qkZlvP4I474CmCne43iOn85kALokvm3uIVqtvFFidgrgHT_IUGYxzsnTGaXH3IRFTOibao3YUgHthkMWJ9jk7/?imgmax=800)
3) Create paypal model class
![](https://blogger.googleusercontent.com/img/b/R29vZ2xl/AVvXsEhatUdr21u0qn0yPxZc3gaQLQRbCf1qV5Bti44cOf72blZUSqIZe3JAyKpAoqWm7_OuOuwt334nfBKRQFlAIsPGVm2Lqi8lEb3sxNkhhshA7vxEa4cjwzIAA-PoTsPUzWRdYKaBv5q3HLlp/?imgmax=800)
4) Create action in home controller to post data to paypal
![](https://blogger.googleusercontent.com/img/b/R29vZ2xl/AVvXsEiSksSMyzzNJRWpJgsHN9qC4dmCuQVTEVcgHNcTKShL2xPqYfh63rnoSEuT7-iBipb8D4R1F-WWQX4ZRwg2MAlYPRvxtL7ja45XjHbjq_8aQnZnevPuQytnPpSrcUjz7MLhq0kfdLaWagOR/?imgmax=800)
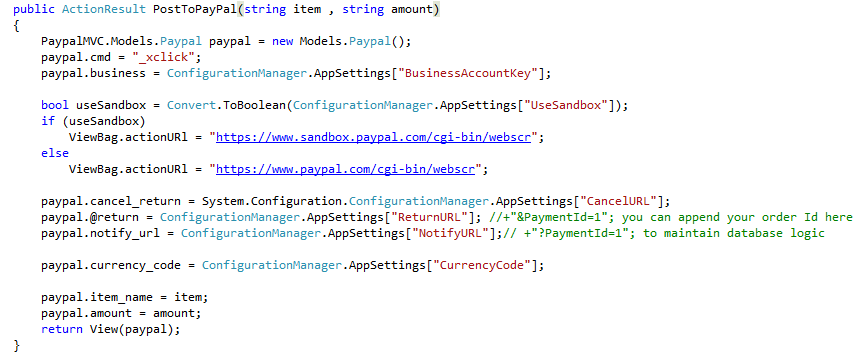
here we post item information in form so we can retrieve it using parameter as you can see that value when you debug as per below
![](https://blogger.googleusercontent.com/img/b/R29vZ2xl/AVvXsEgfgU1w-YyubwK-tnjCw3_fIBwv8Kwwas0XfKSNSo6B_17LgH3UP3paAGecldAqNBqJvt0Gd4HKIPNIUaT46J0waKgufmT93fh3Huvz1eF48oSRiB2NJWkF696P-T-8TX-YB29xCpEzmVdk/?imgmax=800)
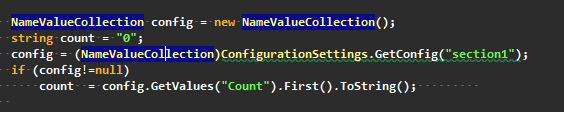
in that you need to set following parameters in web.config
- BusinessAccountKey: business account key for seller
- UseSandbox: weathere to use sanbox or live
- CancelURL: return to this when user cancel
- ReturnURL: return after payment
- NotifyURL: use for IPN to notify
- CurrencyCode: transcation in which currency
to use sandbox you need to create account at
https://developer.paypal.com/and in that you can create business account as well as buyers account to testing as per shown in fig
![](https://blogger.googleusercontent.com/img/b/R29vZ2xl/AVvXsEipHKzkcANLeutSO-MF63uC5BEPMKHw0O9acLwqRcPQw_6i80RCk6toLvC4y3_6wTAD-BUejs01CBquCwf0i8SSkWrJrlnmZeKoQy1ea9oPUyQceLdYfAyT9syOCOk41A2KoT8bSUMweoDO/?imgmax=800)
I have added that in web.config as per below
If you new for paypal integration then first go through this introduction
here .
5)create view of this action (empty view) and code as per below
![](https://blogger.googleusercontent.com/img/b/R29vZ2xl/AVvXsEgPaEuG24inxq1Lq4Sw37hPerK5WMYwdr035ri-CNjNb9obDFTw0_khwGY84R8oEYVnMQHehFvb3eq8gZVNYZjXHyFjcHla_epP9afdUezTg6D-fLOfvfvSM5gR4ZItkoFVHcCFiYn8EqpL/?imgmax=800)
6) Now run the site and click pay with paypal , you will be redirecting to paypal as per below
![](https://blogger.googleusercontent.com/img/b/R29vZ2xl/AVvXsEjD5KHSWmhwxdBC8TPFJzD_fLepr0FJNv-fLRGQoGkFF-GBw7OtJEE7jUbunKVHOlDiLk-K4xcTzbdcbsF3Ux9ee7LmbsxnMIB3ANCjhhyMZtIXY26v2T4Iuxow9i6xnudUbL-Cu9PhxyK2/?imgmax=800)
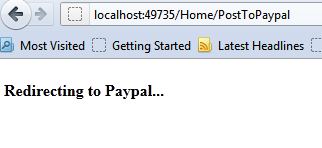
here you can pay with your personal test account and redirect to back as per app-setting URLs
7) To handle redirected request you need to create following controller and respective views with your logic and message.
- RedirectFromPaypal
- CancelFromPaypal
- NotifyFromPaypal